Martin Lawrence Photography
The best way to make Levels adjustments in Photoshop
Posted on 19th March, 2018
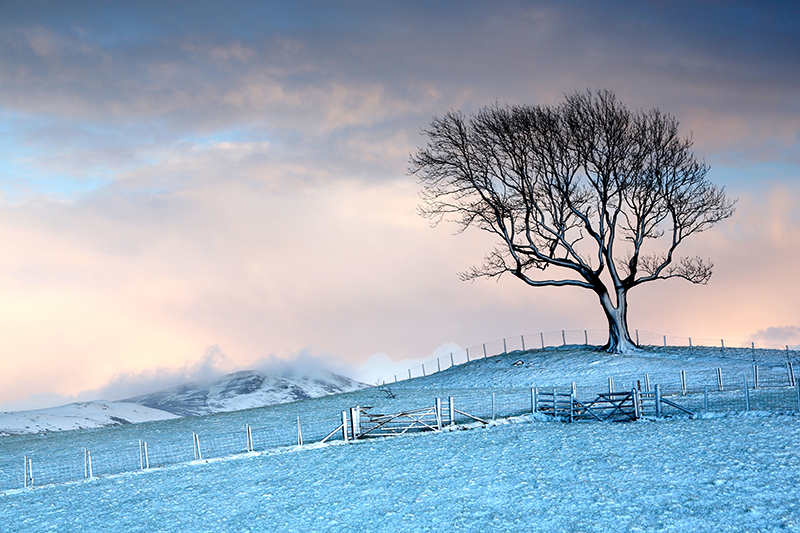
Image 1: Image after Levels adjustment
In this tutorial, I'm going to show you The best way to make Levels adjustments in Photoshop.
One of the most powerful and useful tools Photoshop has to offer is the Levels command. This command can move and stretch brightness levels in a histogram using three main components: a Black Point, White Point and Mid-tone slider. The position of the Black and White Point sliders redefine the histogram’s Input Levels so they are mapped to the Output Levels, whereas the Mid-tone slider redefines the location of mid-grey.
Levels adjustment can make an average image look great. Most people have heard of this command and use it all the time but there is an easy way to use the Input Level sliders at the bottom of the Levels dialogue box to know exactly how far to change your image.
When you take an image on a digital camera you always create a histogram that shows you how light has been captured i.e. blacks, whites and mid greys. The histogram should appear as near as possible to a pyramid with blacks at the bottom left, mid-grey at the top point and whites at the bottom right. It’s not always possible to attain this in camera but this can be easily corrected within the Levels command.
You can find the command by opening Photoshop and then opening the image you wish to amend. The Levels command can be found by selecting— Image -> Adjustment -> Levels. This will make the Levels adjustment dialogue box appear on the screen.
Image 2 : Levels adjustment dialogue box
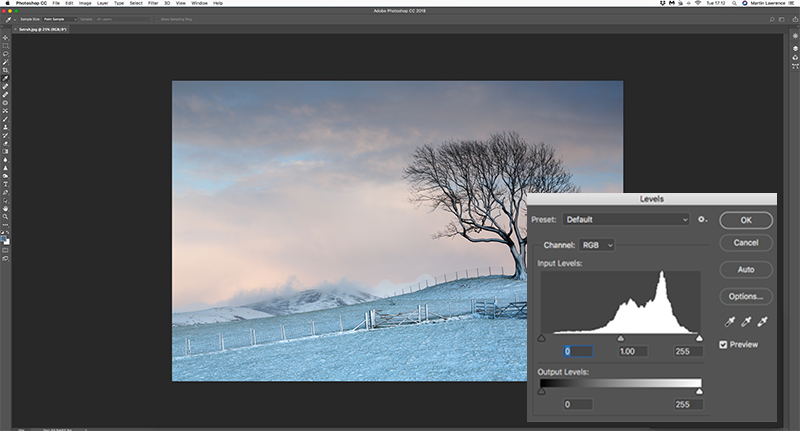
Now for the interesting bit. You need to synchronize or (slide) the Black Point and White Point sliders in the Input Levels dialogue box towards the middle of the histogram.
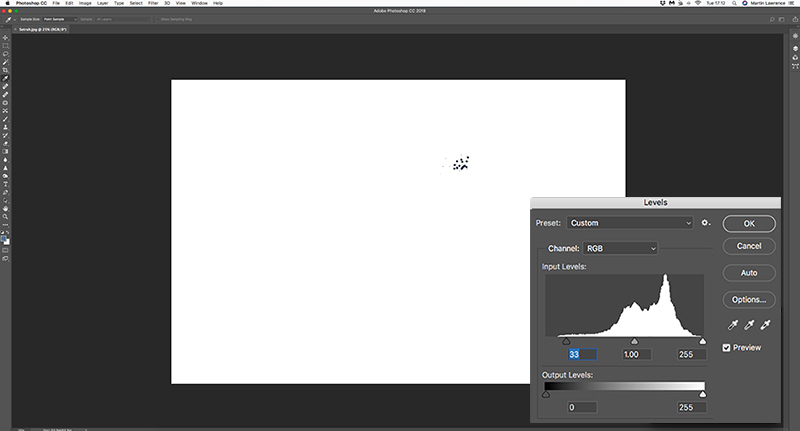
Most people will just make this adjustment according to their own taste until they are happy with the result. There is, however, a more accurate way of knowing how far to move each slider. This amount of movement is easier to work out if you press on the Alt key and, whilst still holding this down, left click with the mouse on the left hand Black Point slider. Your image will then turn white. You should now move the slider until the first pixels which form the image start to appear on the screen as shown in Image 3.
Image 3: Adjusting the Black Point Input slider
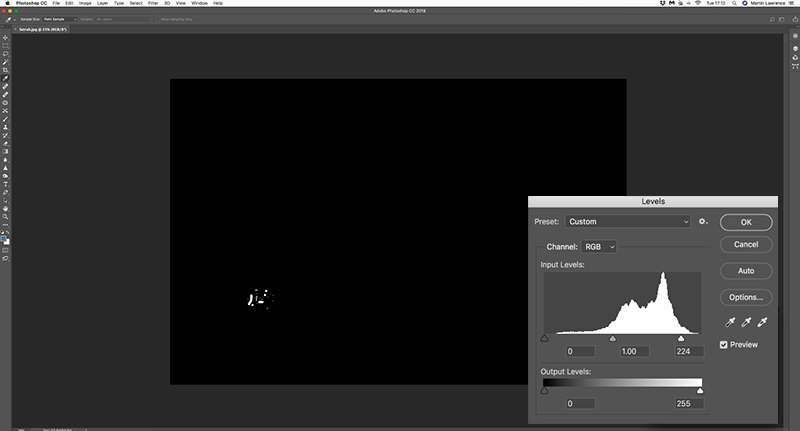
Repeat this procedure with the right-hand White point slider. This time, however, the screen will initially turn black. Move the slider again until the first pixels which form the image appear on screen as shown in Image 4.
Image 4: Adjusting the White Point slider
If you feel that the image is still too dark or light then move the Mid-grey slider to correct this.
With using the ALT key on both movements you get a much more accurate end result.
Image 5: Image before Levels adjustment
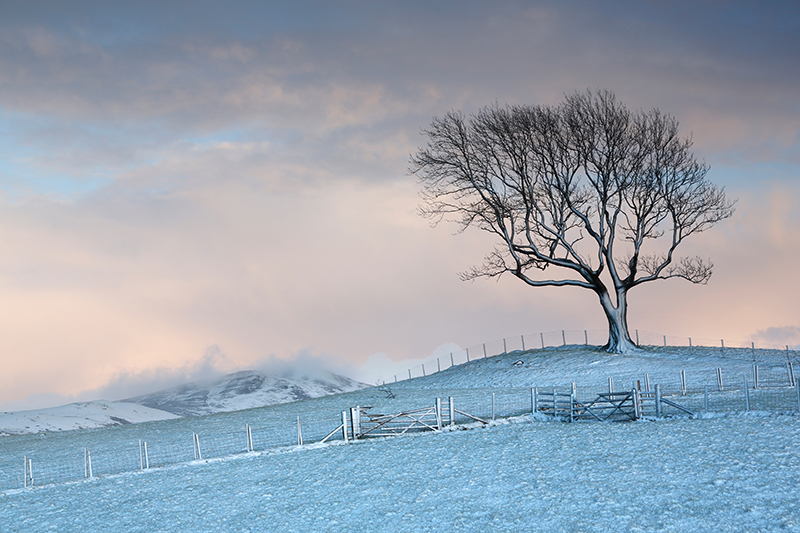
Image 6: Image after Levels adjustment Prints Available

CONCLUSION
If you have any comments or questions on this tutorial don't hesitate to Contact me.
Why not join me or one of my 1-2-1 or small group workshops or, if you want specific Photoshop training, check out my 1-2-1 Adobe CC Photoshop Tuition for Photographers.
