Martin Lawrence Photography
How to sharpen an image in Photoshop
Posted on 30th March, 2018
I get several e-mails every week about the best way to perform post-capture sharpening in Photoshop. With this in mind, I have decided to write this Article about what I consider to be the best way to carry out this very important process. I see many images out there that have been over sharpened and, let's face it, it doesn’t look good. There is nothing worse than seeing an image with that tell-tale ‘halo’ effect around parts of the image that is obviously a result of over-sharpening.
This Article will show you How to sharpen an image in Photoshop correctly without destroying the image that you have taken time and effort to capture in the first place. It will not perform miracles on images that are clearly out of focus in the first place but it will allow you to make your images look a lot crisper and punchier.
Sizing your Images
I know this may not seem obvious, but good sharpening starts when you upload your image from your camera and create its initial size. This can be done via the RAW converter as shown at Image 1.
Image 1: Sizing your image via the RAW converter
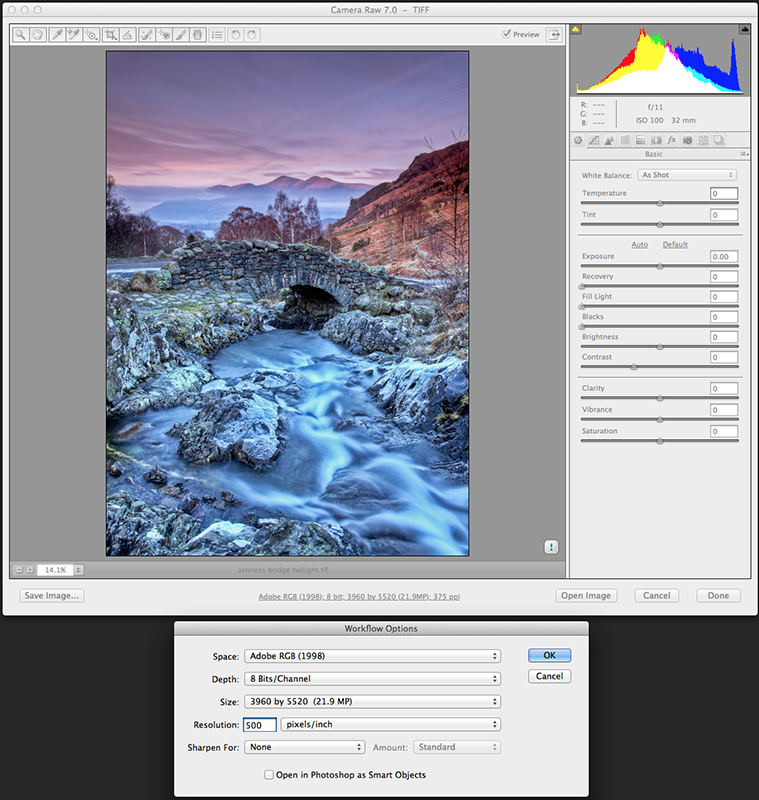
or just by going into Image -> Image Size from the Photoshop Menu as shown at Image 2.
Image 2: Sizing your image via Photoshop
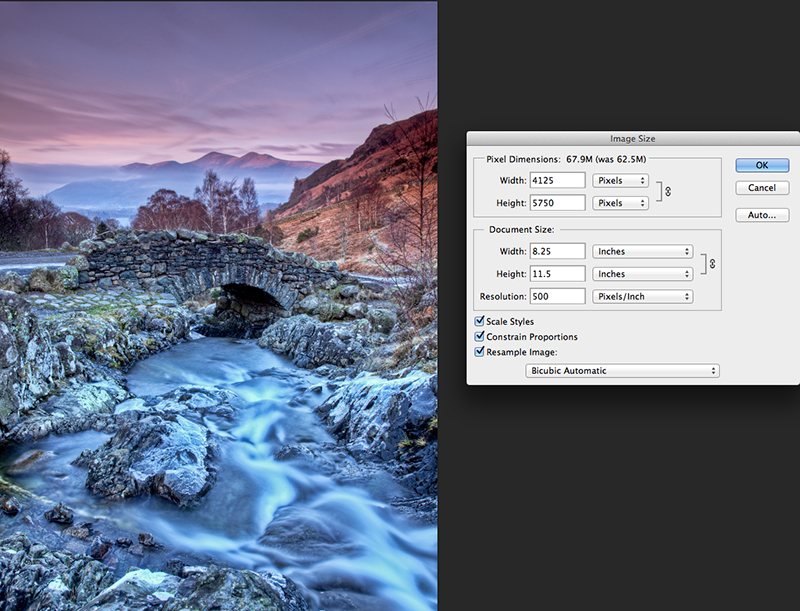
As you can see from both examples, I have used a Resolution of 500 ppi (Pixels/Inch). As my Canon 5D Mark III camera captures images at 21.9 million pixels, using 500 ppi will give me an image size of around A4 which is the size at which I like to manipulate my images, but this is, of course, a personal preference. If I was using a camera that captures images at 12 million pixels, I would use around 380 ppi which again would give me approximately an A4 size image. The ppi used is important to remember as this plays a big role later on in the sharpening process.
Convert to Black and White
Generally when people sharpen their images they tend to sharpen in colour mode. It is far better to sharpen in black and white mode, this will prevent that halo effect that can occur when sharpening in colour mode. You cannot get this halo effect when sharpening in black and white. The first stage to doing this is to go to Image -> Mode and select Lab Color as shown in Image 3 .
Image 3: Selecting Mode and Lab Color
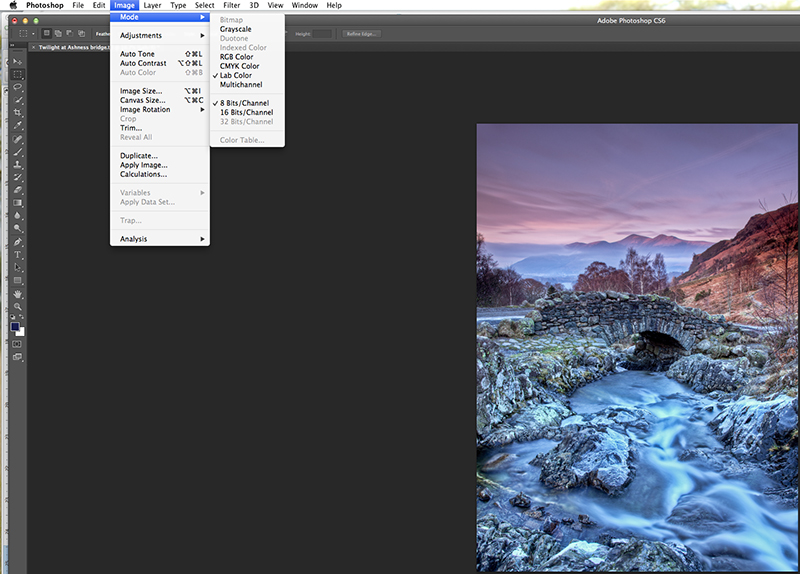
The next step is to go to Window -> Channels and click on Lightness on the small window that appears. This will then convert your image to black and white as shown in Image 4.
Image 4: Converting your image to black and white
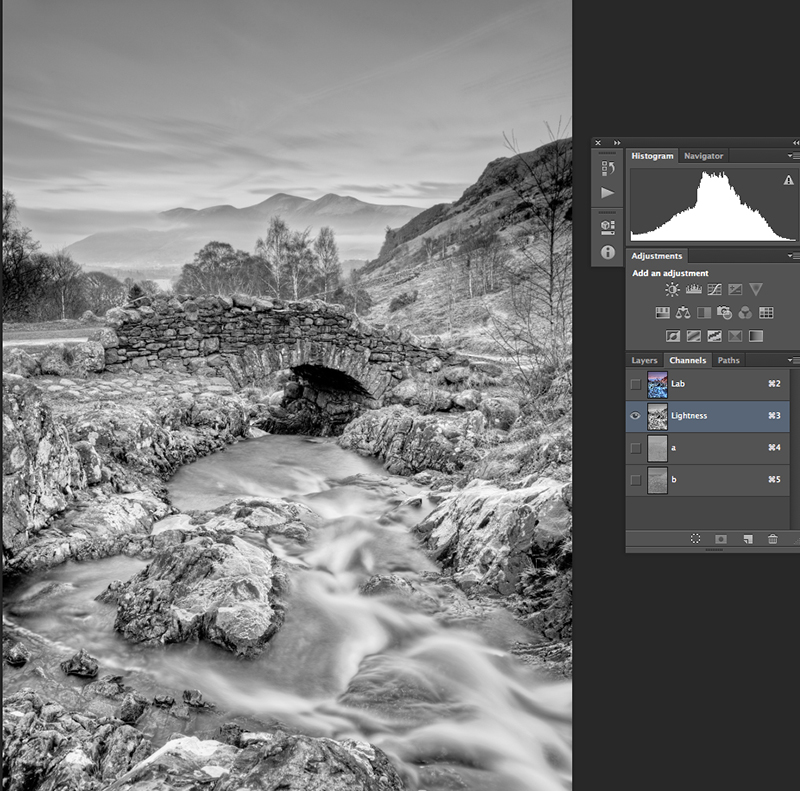
Sharpening the Image
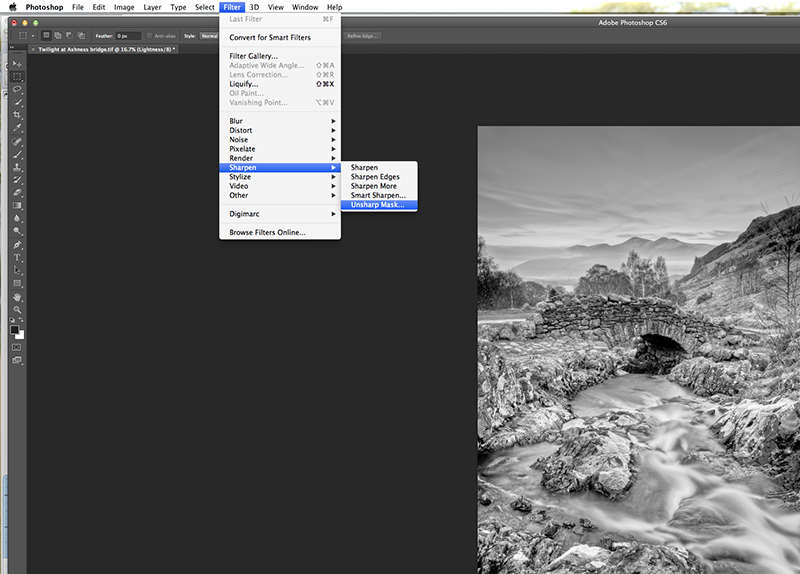
The following sequence will be familiar with most people who sharpen their images via Photoshop. Select Filter -> Sharpen -> Unsharp Mask… from the menu as shown in Image 5 .
Image 5: Bringing up the Unsharp Mask command
This will then bring the following window to the screen.
Image 6: Using Unsharp Mask
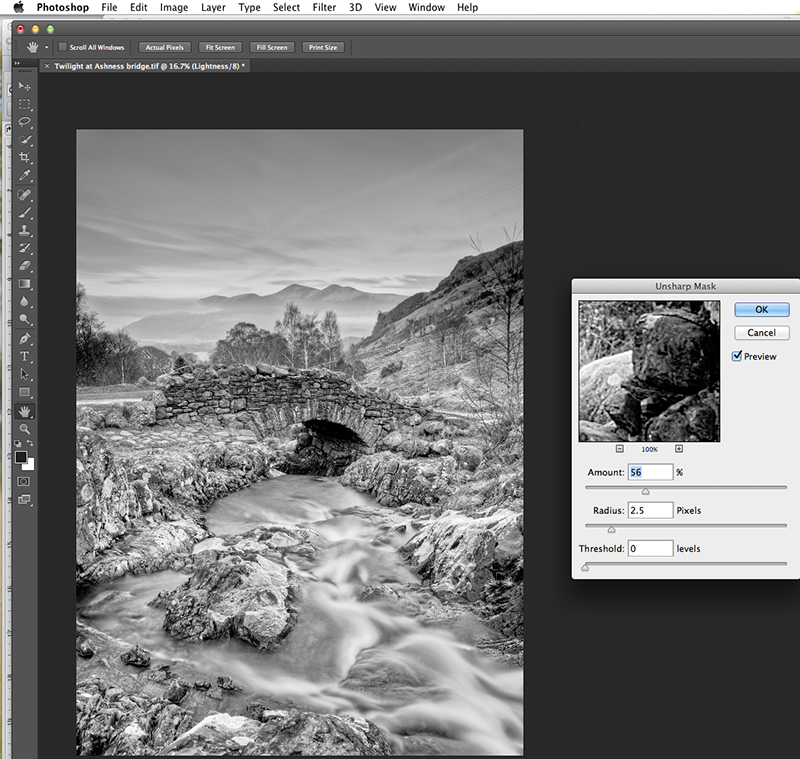
There are three adjustments you can perform whilst in the Unsharp Mask window.
THRESHOLD - Always keep this slider bar at 0.
RADIUS - This is the most important slider bar in this window. The Radius is the size of an individual pixel within your image. When you sharpen an image you are making the edge of each individual pixel stand out or more defined which makes your image sharper, therefore the software needs to know the size of the pixel it’s sharpening. This is where you need to remember the ppi that you used earlier when you uploaded your image via Image Size or the RAW converter. In the example above, the image was uploaded at 500 ppi. The formula to calculate the Radius figure to use for your images is as follows:-
Use the first 2 characters of the ppi which in this case is 50. Half this value and put a decimal point in the middle. This would equate to 25 then 2.5. Therefore, the Radius for an image that has been uploaded at 500 ppi would always be 2.5. If the image was uploaded at 380 ppi then the Radius would be 1.9 etc…
AMOUNT - This is the amount of sharpening you wish to perform on your images. I normally use a value of around 40 – 60. Please don’t go overboard when sharpening. Trust me, a smaller value is better than a larger one. You can see, however, that no matter how far you move this slider no ‘halo’ effects are created – this is the benefit of sharpening in black and white.
Convert your image back to Colour
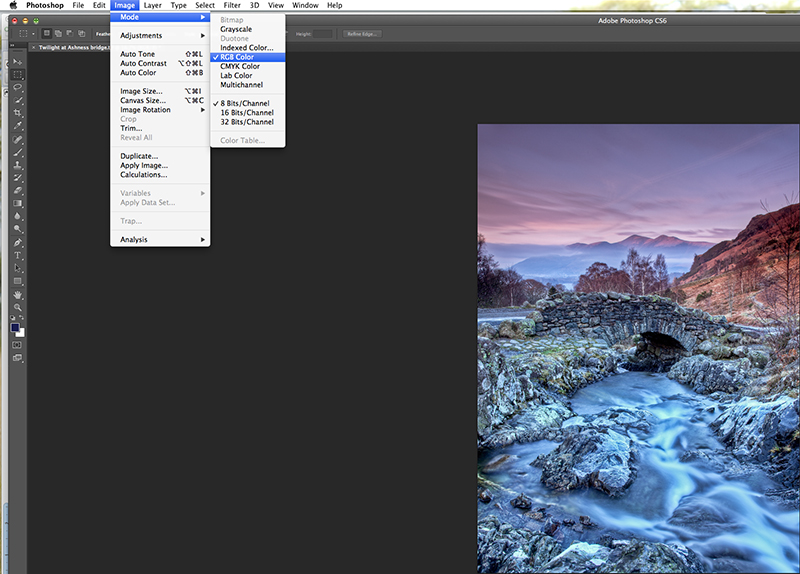
The last action to perform is to convert your image back to RGB colour as shown in Image 7.
Image 7: Converting your image back to RGB colour
Conclusion
I hope this tutorial on Sharpening Digital Images will be of benefit to you all, but remember, it’s always best to try and get the sharpest image you can via your camera using good photography techniques.
If you have any comments or questions on this tutorial don't hesitate to Contact me.
Why not join me or one of my 1-2-1 or small group workshops or, if you want specific Photoshop training, check out my 1-2-1 Adobe CC Photoshop Tuition for Photographers.
© Martin Lawrence Photography 2019
