Martin Lawrence Photography
How to photograph a rainbow
Posted on 18th March, 2018
The changeable conditions that we are having at present make this a great time to get out there and photograph yourself a rainbow. It’s always such a thrilling sight to see and, if you capture your image correctly, will be a great addition to your portfolio so it is important to learn how to photograph a rainbow.
FIRST FIND YOUR RAINBOW
Rainbows form when two elements come together– falling or spraying water and bright sunlight. They are most easily found either at the sharp edge of a rainstorm or in the spray from a fast flowing waterfall, geyser or fountain.
RAINSTORM
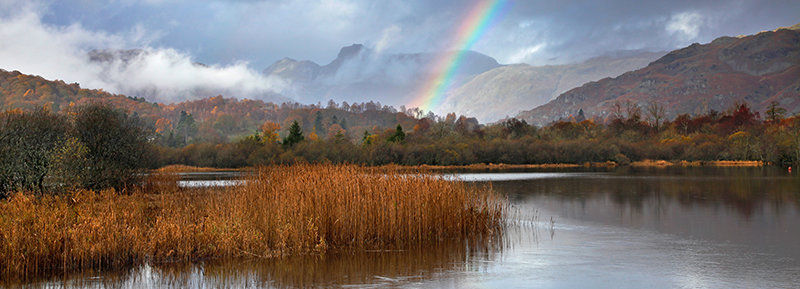
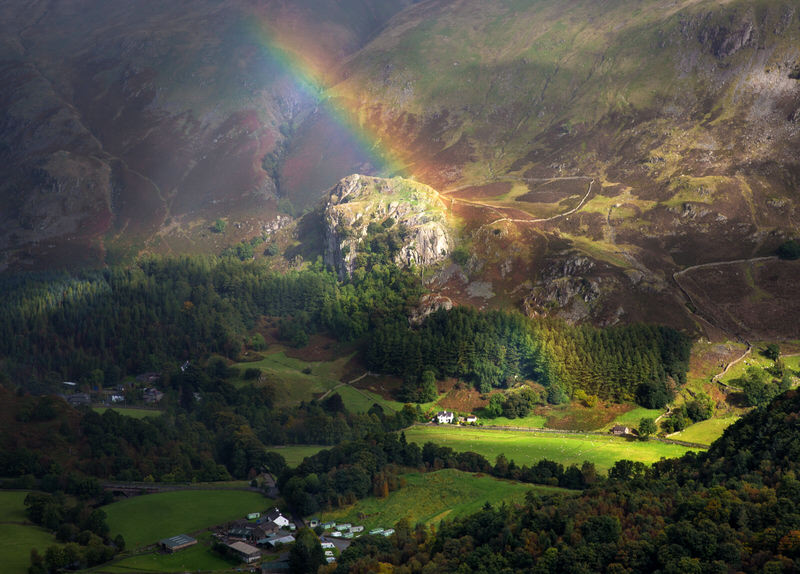
A rainbow can appear when a rainstorm passes by your current location and the sun suddenly reappears. It almost always lasts for only a couple of minutes so you need to be prepared. It is often accompanied by a dark sky as can be seen in Image 1. This makes a dramatic backdrop and serves to enhance the rainbow’s colours. You will need to shelter your equipment until the storm goes over but be ready to roll when it does.
Image 1: Rainstorm - Langdale Pikes from Elterwater Tarn Prints Available
SPRAY
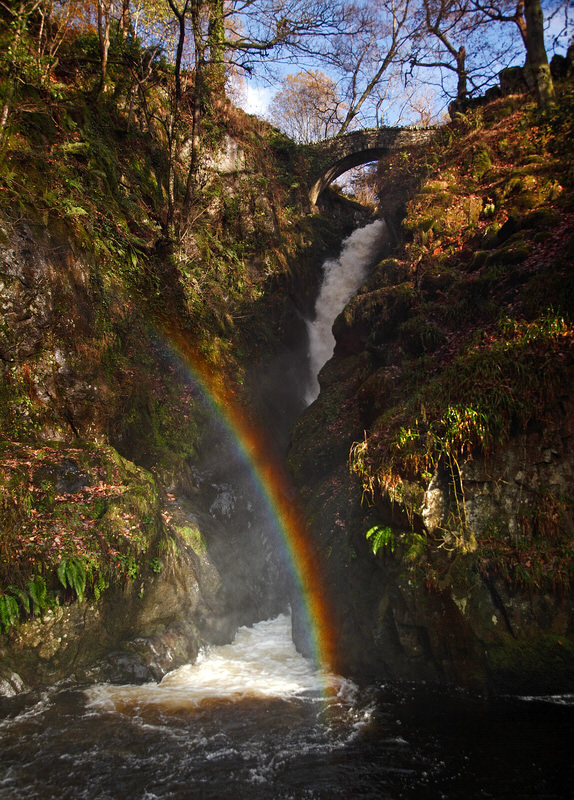
This is much easier to predict. You just need a sunny day and a waterfall or fountain where you can manoeuvre yourself so that the sunlight is at the right angle and ensure that you have plenty of spray that runs continuously.
Image 2: Waterfall spray - Aira Force, Ullswater Prints Available
Get your composition right
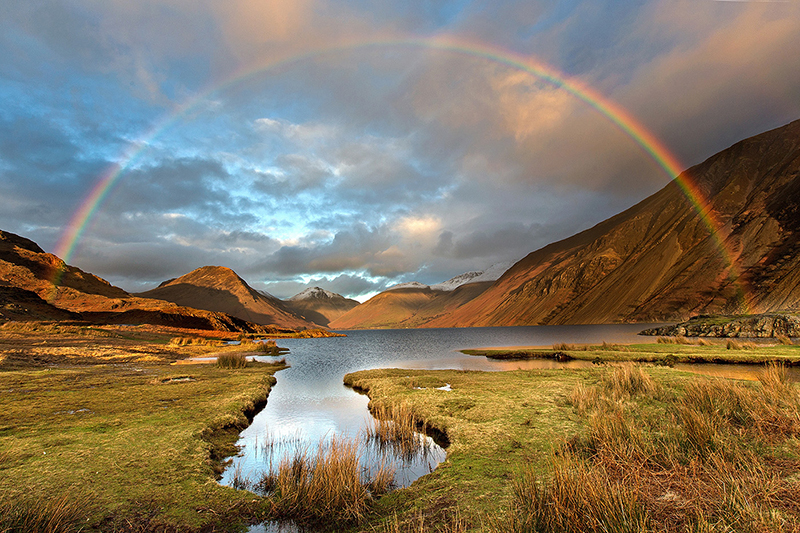
A rainbow on its own would make for a very dull shot. To make a rainbow shot interesting, you need to have another dominant feature so you can use the rainbow as an accent or visual prop. You may be lucky enough to find a rainbow hitting the top of a barn or other building or be able to use it to completely frame your scene as in Image 3. Remember the rule of thirds and try to get the endpoint to fall into one of those rule-of-thirds intersections. Think about using some foreground feature such as a fence, rocks or a path if there is one, to lead your eye into the shot but be sure not to include foreground distractions that could spoil your finished image.
Image 3: Using a rainbow to frame your scene - Rainbow at sunset over Wastwater Prints Available
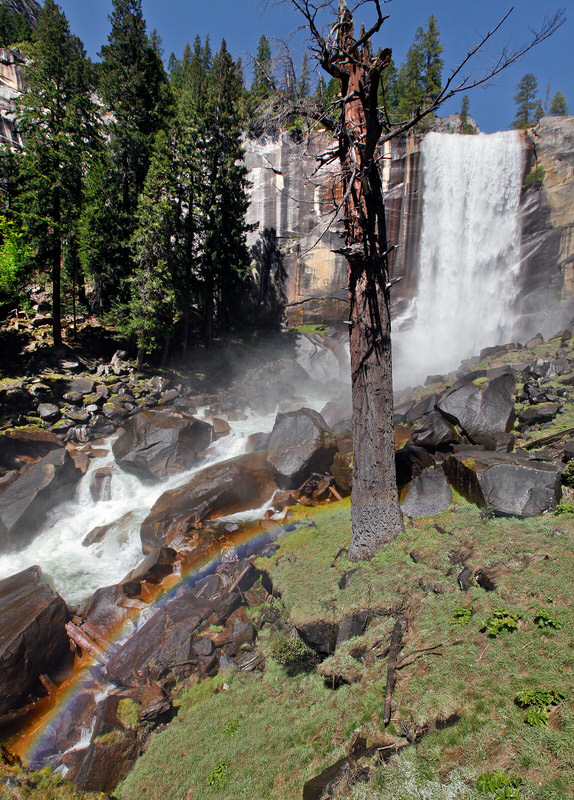
In Image 4, I have aligned the rainbow to the sweep of the rocks at the base of the waterfall with it finishing at the base of the old tree. This creates a great lead-in line to the shot and shows that the rainbow doesn’t always need to be the main focal point of the shot.
Image 4: Using the rainbow as a lead-in line - Upper Vernal Falls, Yosemite Valey
Use the correct camera techniques
TRIPOD
An essential piece of kit when shooting rainbows as they often appear in dim lighting conditions like the trailing edge of a rainstorm. Also, the use of a polarising filter (see next point) results in a possible further 1.5 stops of light loss.
POLARIZING FILTER
The colours of the rainbow can be rendered more intense and saturated by using a polarising filter. If you rotate a circular polarising filter, it is possible to get different saturations of colours, reflections and levels of contrast but take care as too much polarisation can actually make the rainbow disappear!
LENS
If there is only a partial rainbow in sight and you can only see one of its endpoints, use your zoom lens to get close to it. But don’t forget to remember your composition.
Use your wide-angle lens to capture a complete rainbow and to also make it appear more semi-circular. You may be able to capture both endpoints in a wide-angle shot if there are no obstructions. This makes for a very compelling image. With the sun high in the sky, you can capture a full arc with a 28mm or longer lens.
EXPOSURE
Give yourself the best chance of success by bracketing exposures. Slight underexposure will tend to enhance the colours of the rainbow giving deeper saturation.
RAIN PROTECTION
A rain cover is useful to keep your equipment dry whilst you are waiting out the storm. If you want information on ‘Shooting in Wet Conditions’ then check out an article of the same name that I wrote earlier this year which you can find here Tips for Shooting in Wet Weather Conditions.
Conclusion
The opportunity to capture a rainbow can come suddenly and last only a few fleeting moments. On days when rain is in the forecast, keep your tripod, a polarizing filter and the right lenses in your car. Get ready to jump out when the sun peeks through and a rainbow appears and hopefully you’ll get an award-winning image to be proud of. Even if the rainbow looks faint, shoot in any way and make sure that you shoot in RAW so that you have the opportunity to brighten it and maybe intensify the colours during post-processing in Photoshop. You can buy a rainbow filter but I definitely wouldn’t recommend this as the result looks false and unrealistic. You get a far superior result by getting that shot by yourself.
Why not join me or one of my 1-2-1 or small group workshops or, if you want specific Photoshop training, check out my 1-2-1 Adobe CC Photoshop Tuition for Photographers.
Image 5: Changing light conditions- Rainbows End at Castle Rock Prints Available
© Martin Lawrence Photography 2018
